Branding Your Timeline
Your timeline should look like it came from your business, not from a generic tool. Premium fonts are available on all paid tiers. Logo upload, custom colors, and branded PDF export are Pro features. Pro also adds custom URL slugs.
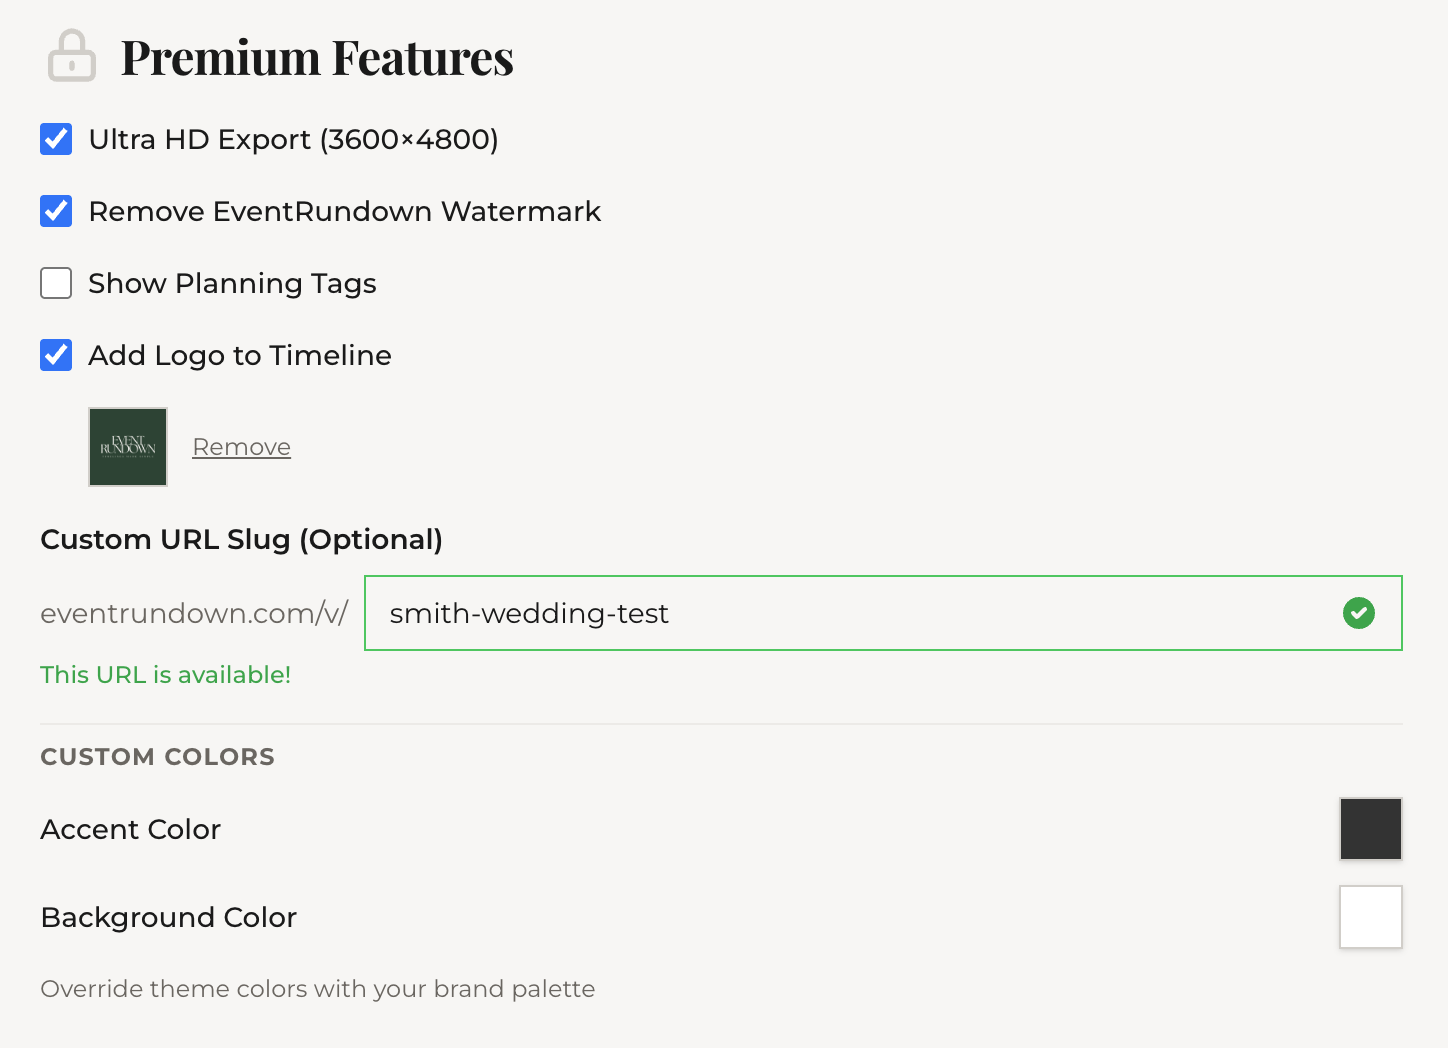
Uploading your logo
In the editor's Design & Export tab, you'll find a Logo section. Upload your logo (PNG or JPG) and it appears on:
- The exported timeline image (in your chosen corner position)
- The PDF cover page
You can also upload your logo from the dashboard Settings page — it applies to all future timelines by default.
Custom colors
Below the theme picker in the editor, you'll see color pickers for:
- Accent color — the primary highlight color used for headers, badges, and timeline spine
- Canvas color — the background color of the timeline
Set these to your brand's exact hex codes. Custom colors override the theme's default palette while keeping the theme's layout and structure.
Premium fonts
Beyond the four free presets, Pro unlocks individual premium fonts including Cormorant, Bebas Neue, and others. Select them from the font dropdown in the Design & Export tab.
Custom URL slug
By default, your share link uses a random ID: eventrundown.com/v/abc123. Pro lets you set a custom slug: eventrundown.com/v/sarah-michael-wedding.
Set it from the editor's share section. Slugs must be unique across EventRundown.
What's next
Your branded timeline is ready. Next: see how it looks when your clients open the link — the branded viewer page.